How to photograph butterflies

While this seems an ideal subject for nature photography, yet many starting photographers find photographing butterflies quite challenging. These little winged creatures can be very active and in that way don’t keep still long enough to take the right shots. But with the following list of tips and the right amount of patience, you’ll see that photographing butterflies is a very rewarding photographic activity.
Where and when
From April till late August, butterflies can be found almost everywhere. The most common species have adapted to live in urban areas, so you can find them easily by simply walking around in your own garden. You could even attract different species by planting flowers and bushes that attract these little insects. Certain butterflies could also be attracted by putting out rotting fruit.
In the past decades butterflies have declined dramatically due to the loss of their habitats and the plants that a species of butterfly may be reliant on. To find rare and endangered butterflies you might have to drive to specific locations, where only a small population is left. Keep in mind that these populations are very vulnerable, so always try to take your photographs with great respect for nature and environment.

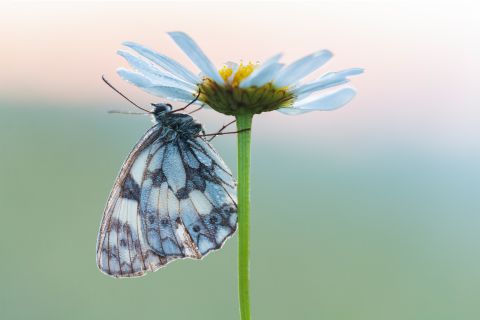
Because butterflies depend on the warmth of the sun, I usually go out, photographing them, in the early mornings and evenings, as they are less active then. It might then be harder to find them, so look carefully for butterflies resting on flowers or grasses.
Don’t hesitate to go out on a clouded day as well; the light is soft then, which allows you to photograph in “good” light the whole day.
Once you have found an obliging individual, approach it carefully without disturbing it and take all the shots you can. It also helps to wear dark clothing because it doesn’t scare butterflies off as easily as light coloured clothing does.
Equipment to use
I could actually write a whole article about the equipment necessary for photographing butterflies, but if you’re just a starting photographer of butterflies, I would recommend you the following material in particular. The best choice would probably be a (digital) SLR combined with a macro lens but if you don’t have that at hand, you could also use your telephoto lens. My first butterfly shots were taken with a Nikon Coolpix 995, so even a digital compact camera can get you started.
Furthermore, I would recommend a macro lens of 100mm or more, because they allow greater working distance. Moreover a longer focal length gives a nice out-of-focus background. I currently use a Canon Eos 40D together with a Sigma 150mm macro and this combination gives me very satisfying results when taking shots of butterflies.
Most of the times I use a tripod as well; you will be working with rather small apertures in order to get the butterfly completely into focus, therefore resulting in low shutter speeds. If you go out early in the morning or on a cloudy day, the available light might be poor and then a tripod really is necessary.
On a cloudy day, a flash unit can be used as a fill-flash to add an extra punch to your image or used as an extra source of light. When photographing in full sun, use a fill-flash to soften the harsh shadows.
For really small objects, extension tubes allow an even closer focusing distance. An extender will allow a greater working distance and a remote cord can avoid blurry images due to camera shake, when photographing at very low shutter speeds.

Things to keep in mind
When photographing in close-up, the depth of field is very small. So in order to have your butterfly completely in focus, you need a small aperture. For butterflies that have their wings closed an aperture of F5.6 will do, but for butterflies that have their wings spread open, you might need an aperture of F10 and higher. If your camera has a depth of field preview button, use it to see how much of your subject is in focus.
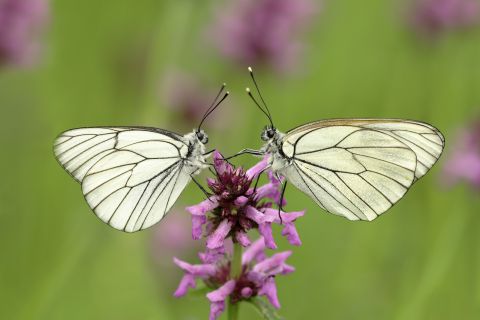
You should also pay attention to your background. Try to avoid cluttered backgrounds. By simply changing the position of your tripod a little, you might avoid distracting objects in the background. Images that have a soft out of focus background, isolating the subject, have far more impact on the viewer.
I suggest you use manual focus when doing close-up photography. The narrow depth of field requires an extremely precise focus and having your camera focusing on the wrong part of your subject can completely ruin your shot.
Look for a good composition, generally avoid placing your subject in the middle but use the rule of thirds, your image will have far more impact on its viewers. If your camera has a live preview function, you can also use this to check your composition.
Finally take a few shots and check your histogram for correct exposure.
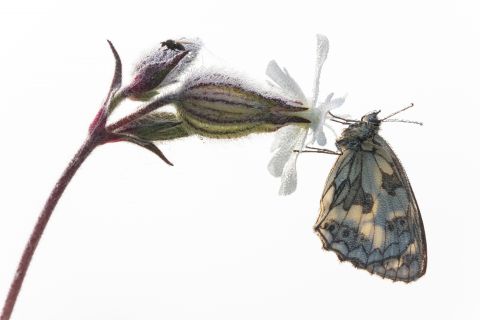
I find that butterflies lean themselves very well for experimenting with light. Step away from the standard image and take that same shot using backlighting, you might be surprised about the results.
Good luck
As you can read there are a few things to keep in mind. It is often very frustrating when you see a nice butterfly sitting on a colourful flower, you approach it very carefully, put your tripod and camera in position and when you are about to take the first shot it flies off. But if you have enough patience I can assure you that some rewarding images can be taken. Think outside the box and try to add a little more drama to your shots, by trying out different techniques. Don’t hesitate to photograph from different angles, in different light and you’ll soon notice that experimenting with all these elements will improve your pictures. I hope these basic tips can get you started, but don’t forget to be creative yourself.
